Victoria Swiss Roll, A Blogiversary Dessert

This week marks three years since I started this blog, which means it's been three years of learning lessons the hard way (ALWAYS the hard way), three years of getting the side-eye from Judson on the weirder recipes even as he supports every dish I attempt to make, and three years of actively avoiding the recipes for swiss rolls sprinkled throughout the Recipe Box. But I've picked up a lot of skills in the last three years, and finally decided it was time to tackle a proper swiss roll in the style of a Victoria Sandwich. It was a 2018 goal of mine to learn to make a decent swiss roll, so in honour of the third anniversary of The Recipe Box Project, here we are!

I still make a lot of American and Americanesque recipes these days; a solid chunk of recipes in the box are probably identifiably American, and in a pinch without other plans to the contrary, I'll probably always fall back on the recipes I grew up with. But I'm always trying to broaden my kitchen repertoire and become more experienced with British and especially Scottish dishes. So to combine my roots with my adopted culture, here's a swiss roll made in the style of a Victoria Sandwich- the most quintessential of British desserts.

Loads of tiny bubbles, so make sure you tap that batter before you cook it!

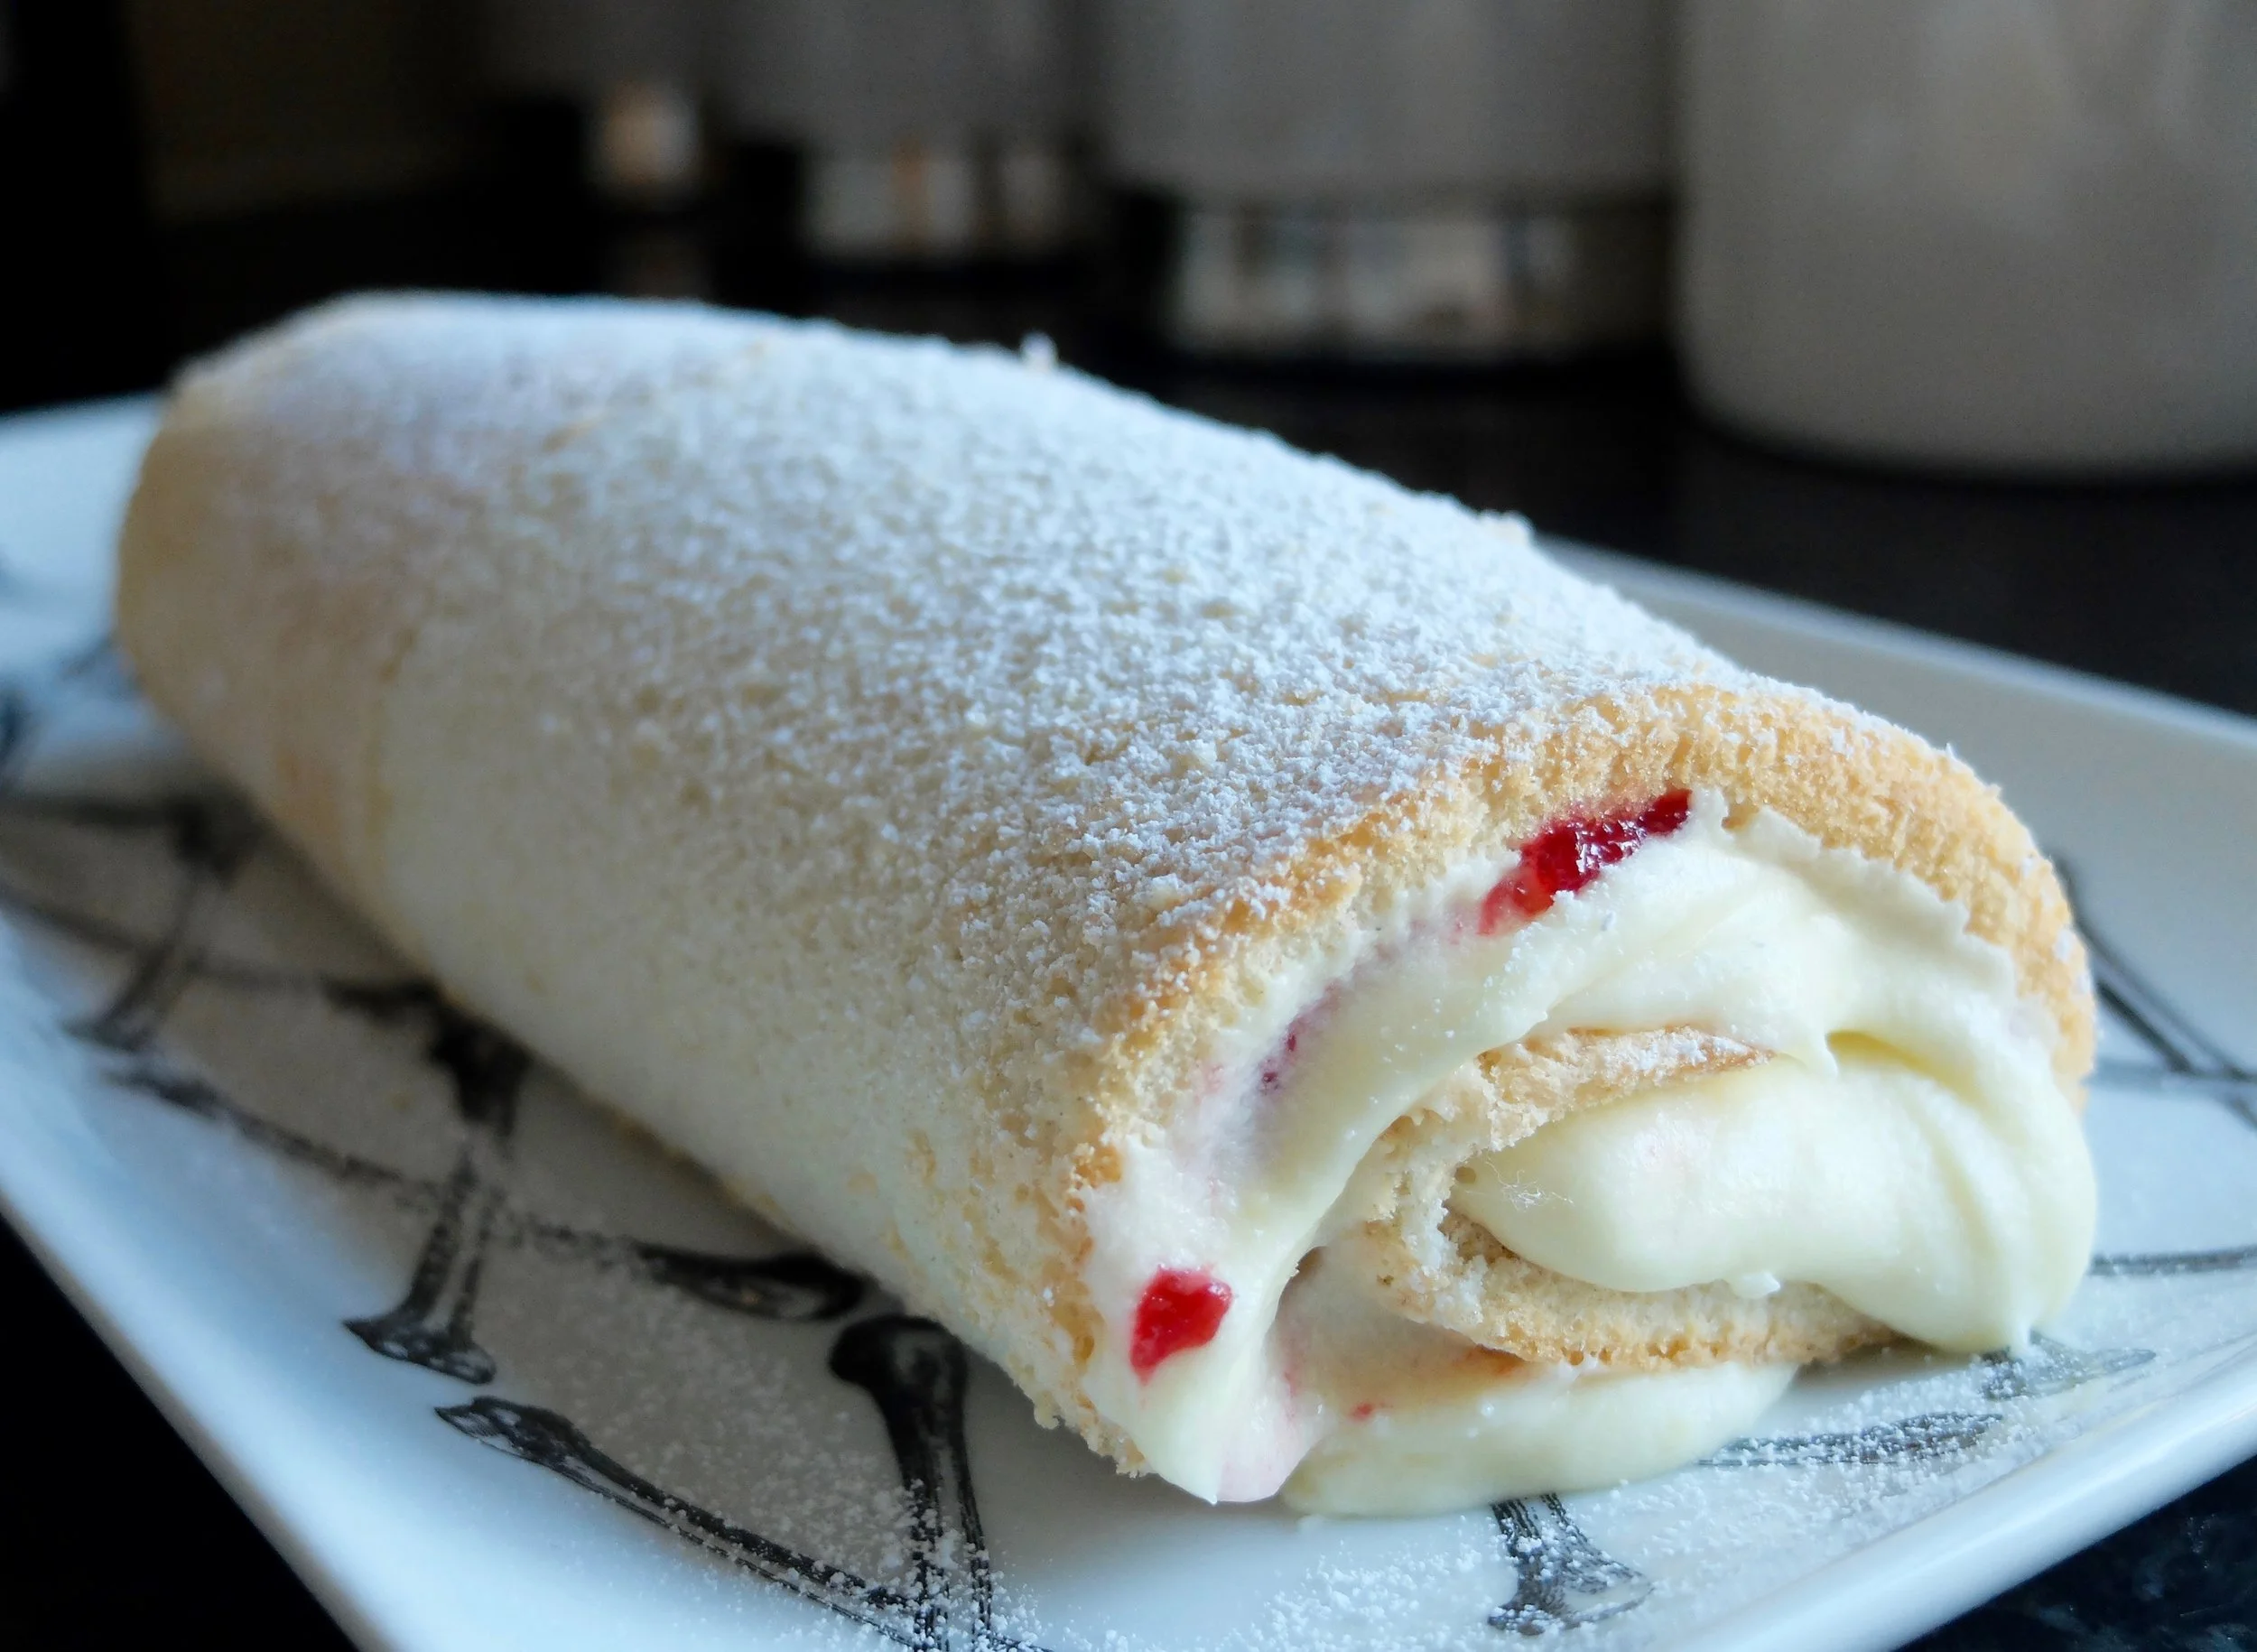
See that filling oozing out? That's why you add extra powdered sugar if it's too thin!

A Victoria Sandwich is made of two layers of vanilla cake sandwiched with a filling of jam and a simple buttercream or whipped cream, the whole thing dusted with powdered sugar. I hate a Victoria Sandwich because I am a baptised member of the Church of All Possible Frosting, but using the flavours of a Victoria Sandwich in a swiss roll means you get all the necessary flavours but at a ratio of ¾ cake to ¼ frosting (this is the holy ratio when it comes to cakes, as far as I am concerned). What I'm saying is: this swiss roll is the perfect cake. A combination of British flavour and American techniques, beautifully presentable to your pals, your colleagues or anyone you need to impress, and you don't have to pipe or smooth any frosting!

Swiss rolls aren't really a thing in the US these days; before making this, I had never even had a swiss roll before, much less made one. I haven't quite perfected my own technique yet- if Mary Berry was invited over for tea, she'd point out that my swirl could be an awful lot tighter*- but I was still pretty stoked at how this one came out (a big improvement over the first time I tried to make one back in 2016... the whole thing fell apart into a pile of messy crumbs before I even got it out of the pan). Then a Scottish friend asked me what I've been cooking lately and I humble-bragged about how I had finally made a successful swiss roll and I guess she didn't realise that I was proud of it and had never made one before, so she rolled her eyes and told me a story about learning to make an amazing swiss roll way back when she was in primary school and how years later as a teenager, her home economics class was such a joke because they did nothing but make swiss rolls every day for weeks and it was the easiest class she's ever taken.

A few words of advice: if there was ever a recipe worth getting your mise-en-place done before you even start, it's this one. Make sure you've read through the recipe and have your pan prepared, your oven preheated and your dishtowel set aside and ready to be used. This isn't a difficult cake to make (and your frosting doesn't have to look stellar!), but you should be prepared for every step of the process before you begin or you'll end up with a cooled cake that won't roll properly. You can fill this cake with anything you want; a chocolate ganache with cherry jam would be amazing, or a citrusy fruit curd. I used raspberry jam and an almond-infused whipped cream cheese frosting to mimic a Victoria Sponge, and I have no regrets.

*No she wouldn't, because Mary Berry is a gem of a person and would never be so rude. But Paul Hollywood totally would.

The verdict:

5 spoons out of five. Besides being delicious, this cake is versatile, beautiful, not too heavy and a perfect complement to afternoon tea, a birthday party, or your next dinner party.

This version of cream cheese frosting makes a glaze, not a frosting, so I updated it below. Don't try to use this one! 

one year ago: mocha cake with caramel frosting
two years ago: swiss chocolate cake
three years ago (new!): old-time chocolate cake with fudge frosting

The recipe:

Victoria Swiss Roll

the directions:
cake:

Preheat oven to 190C/375F.
Grease a 10x15 shallow-sided pan, then line the bottom with greased parchment paper and set aside.
Sift together cake flour, baking powder and salt, then set aside.
On medium-high speed, beat eggs until thick and pale yellow (approx. 3 minutes).
Lower speed to medium-low and gradually beat in sugar for approx. 1 minute.
At same speed, add water and vanilla all at once.
Beat in flour mixture all at once.
At same speed, continue beating until very smooth and well-blended.
Pour into prepared pan, then drop pan three times onto counter from a height of a few inches to knock out any air bubbles.
Bake 11-13 minutes until just done.
While cake is in the oven, lay a dishtowel on the counter and sprinkle with powdered sugar. Make sure powdered sugar is in a thin, even coat covering the entire dishtowel.
AS SOON AS CAKE COMES OUT OF OVEN, run a knife around the edge of the pan, then turn out onto prepared dishtowel.
Gently peel off parchment paper, then, using the dishtowel as leverage, quickly roll the entire cake into a spiral with the dishtowel, starting with the short end.
Set aside and allow to cool while you make the filling.

Filling:

Beat butter and cream cheese until smooth and uniform.
Add salt and almond or vanilla extract, then 3 cups of powdered sugar.
Beat until smooth, then add ½ c (60g) powdered sugar at a time if needed to reach a soft but spreadable consistency.
Once cake is mostly cool (at least 30 minutes, carefully unroll it from the dishtowel and spread with a thin layer of raspberry jam.
On top of jam, spread or pipe cream cheese frosting in a thick layer.
Starting from the same edge as before, gently but tightly roll the cake into a spiral.
Rotate the cake so that the seam is down and place on a serving plate, then sift powdered sugar over the whole thing.

the ingredients:
the cake:

1 c cake flour (or 1 c MINUS 2 tbsp flour and 2 tbsp cornflour/cornstarch)
1 tsp baking powder
¼ tsp salt
3 large eggs
1 c (200g) sugar
5 tbsp water
1 tsp vanilla
Approx. ¼ c (30g) powdered sugar for sprinkling


the filling:

¾ c (170g) butter, softened
¼ c (55g) cream cheese
3-4 c (375-500g) powdered sugar
¼ tsp salt
1 tsp almond or vanilla extract
¼ c (80g) raspberry jam

Butter Wreaths & Coconut Wreaths

Butter wreaths, finished.

Butter Wreaths: It's not often a recipe I've made for the first time (whether from the Recipe Box or elsewhere) completely blows me away, but this recipe did. Here are all the pros of this recipe, listed in the chronological order in which I discovered them:

  • It's easy.
  • It's a start-and-stop recipe, which means if, halfway through making it you need to walk the dog, it's easy to pause and pick it back up in 10 minutes or an hour or even the next day.
  • THE DOUGH HOLDS ITS SHAPE AFTER BEING BAKED!
  • The cookies, whether rolled out thin into almost wafer-like proportions or kept thick for a softer, cake-like finished product, are delicious.
  • One more time for the people in the back: THE DOUGH FLAWLESSLY HOLDS ITS SHAPE EVEN AFTER BAKING.

Butter wreaths, post-baking, pre-frosting.

While the recipe is for butter wreaths and thus demands that you cut the rolled-out dough into doughnut shapes before baking, having seen how perfectly the dough held its shape, this is my new go-to sugar cookie recipe for any time I want pristine finished shapes. I tested a small amount of the dough by cutting it with my insanely detailed snowflake cookie cutters, and they came out so pretty and accurate I wanted to hang them in the window. Seriously, the dough doesn't budge in the oven, which is super important if you're trying to create wreath-shaped cookies.

Now let's talk flavour: these butter wreath cookies come from a tiny recipe card labelled 'A Christmas Recipe for Butter Wreaths from Bill'. The card comes from a set of several, including the Dusen Stars from last week and a Lemon Snowflake recipe I haven't had a chance to post yet, and I think it must be from a holiday party recipe swap since I recognise most of the names on the cards (though not Bill, which is a shame because I'd like to shake his hand). These cookies are so good that even I, with my frosting obsession, would (read: did) eat these straight out of the oven, without frosting or decorations. This is my new go-to for sugar cookies, and I really hope you'll give them a try.

butter wreaths, post-frosting, pre-garnish.

A final note on the decoration: I had to special-order angelica for the butter wreaths. Do you know what angelica is? I didn't. Turns out it's a plant that's a member of the parsley family, also known as wild celery, and was super common as a decoration on desserts in the 1940s-60s, both in the US and the UK. It's no longer sold in any supermarket I've ever been to, so I ordered it from a baking supply store online. It looks like long, bright green pieces of, well, flattened celery, but I was disappointed to find that since it's candied, it just tastes like sugar. It's a bit of a faff to cut it into tiny pieces to adhere to the finished, frosted biscuits, and honestly if I was doing it again for myself and not for this blog, I'd probably just use green frosting instead. If you don't want to order yourself a packet of angelica, you can either use green frosting to frost your cookies, or frost them white and use green frosting to make a few holly leaves on each cookie. Either way, just make them soon!

coconut wreaths, ready to be poked.

coconut wreaths, ready to be baked.

coconut wreaths, finished.

Coconut Wreaths: I should first say that I sent the coconut wreaths to work with Judson on the day the new Star Wars film was released, so he put them in the break room at his job and labelled them 'Sarlacc Sandpits,' after the creature from the original films. Although Judson has made sure that I've seen those original films no less than twice each, I still have no idea what this is in reference to, but... I'd have to agree that the coconut wreaths did in fact taste a bit like sandpits. I blame the coconut, which, instead of coming from a can as the recipe requested (because canned coconut is not a thing that exists, in any country), was the desiccated kind sold here in the UK. I hate this kind of coconut. It has the exact texture of pencil shavings and almost as much flavour as them, but I had no choice, so I used it. The overall 'wreaths' looked more like the tiny clay thumb pots we used to make in primary school, and even the addition of jam filling in the middle didn't help to really give them much flavour or nuance.

The verdict:
The butter wreaths:

5 spoons out of five. These are, without a doubt, the best sugar cookies I've ever made.

the coconut wreaths:

2 spoons out of five. They still got eaten when they were put out in the breakroom at Judson's office, but... they just weren't that exciting.

butter wreaths, finished.

One year ago: crazy crust apple pie
two years ago: boston cream pie

the recipe:

Butter Wreaths

the directions:

Cream butter until very light and fluffy.
Beat in sugar, mixing well.
Add yolks, one at a time, mixing well and scraping sides after each addition.
Add flour and vanilla and mix on low speed until dough forms.
Turn the dough out onto parchment paper, lay another piece of parchment paper on top, and roll out thin (I preferred the cookies rolled to ¼-inch, but if you want a thinner, more wafer-like cookie, roll to 1/8-inch).
Pop in the fridge for half an hour or the freezer for 15 minutes.
Once dough is well-chilled, preheat oven to 175C/350F and remove top layer of parchment from rolled dough.
Working quickly, use a 2 ½-inch doughnut cutter or two other round things of various sizes to cut wreaths from the dough and place on a cookie sheet (I used a small Pyrex measuring cup and a pineapple corer, but I also freehanded it on a few and it worked nearly as well).
Bake 10-12 minutes until just golden around the edges.
Cool, then frost and decorate with red and green frosting or candies and angelica to resemble holly leaves and berries.

the ingredients:

1 c butter
1 c sugar
3 egg yolks
2 ½ c flour, sifted
1 tsp vanilla
Frosting: I used this recipe for vanilla buttercream
Cinnamon candies and angelica (or additional red and green frosting)

The recipe:

Coconut Wreaths

the directions:

Preheat oven to 175C/350F.
Cream butter and sugar until light and fluffy.
Blend in almond extract, vanilla and flour, and mix until well-blended.
Stir in coconut and nuts, form into a loose ball and chill for at least one hour or up to overnight.
Shape dough into 1-inch balls and place on cookie sheet.
Using the handle of a wooden spoon or the tip of a measuring spoon, make a 3/4-inch depression in the centre of each ball.
Bake 12-15 minutes, until golden brown.
Remove from cookie sheet immediately and place on cooling rack.
When cool, fill each cookie with red jam.

the ingredients:

1 c butter
½ c sugar
1 tsp almond extract
1 tsp vanilla
2 c flour
Scant ½ c coconut (flaked, shredded or desiccated)
½ c pecans or pistachios, chopped fine
Red jam (I used raspberry)

Jam Biscuits, Two Ways: Walnut Ribbon Sticks & Dusen Stars

In the UK, there's a biscuit (cookie) called a Jammy Dodger. I don't know why it's called that, but it's the quaintest, cutest name for a biscuit that I know, so I've always liked them. When we got Holtzmann, her dogwalker gave her a squeaky Jammy Dodger toy which has remarkably remained unscathed over the past six months, and watching her chew on this oversized biscuit is possibly the cutest thing ever. Neither of these recipes are for Jammy Dodgers (which, in case you're curious, are made of a soft-ish shortbread sandwiching a cream and jam centre, with a wee heart cut in the top biscuit for a window onto the sparkling red jam below. Pretty much the most British of all foods).

These biscuits (cookies) are both made with jam (jelly, in American parlance), and though both recipes recommend 'red' jam for festive flair, I think the Dusen Stars in particular would be stellar sandwiched with apricot jam (or whatever other flavour tickles your fancy). When I started making the Walnut Ribbon Sticks, I thought I was in for a treat as the recipe was so easy I could hardly believe it: one recipe of pastry, rolled thin, spread with filling, folded and sliced? Nice. But then about halfway through making them, I realised with a sinking feeling that I had a) never had ribbon candy, b) wasn't so sure what it was and c) neglected to look it up to make sure it was shaped in the way I had assumed. It wasn't. So about half of my walnut ribbon sticks were made as twists, and the rest were (mostly) 'ribbon-candy-shaped,' until I got bored and did the last few as swirls.

Here's one insanely simple recipe for you and one slightly more complicated though still totally worth it recipe. Make these decorative beauties for your next holiday party and you'll be the talk of the party.

The verdict:
The Walnut Ribbon Sticks:

3 spoons out of five. If you like palmiers, pastry or pie crust, you'll love these. Unfortunately palmiers are probably my least favourite dessert of all times, so I found these too dry and crumbly for my taste. They got rave reviews from the people I served them to, though, so it's probably more that they're not my taste than that these are an inherently bad recipe.

The Dusen Stars:

5 spoons out of five. These cookies are amazing- not too distant from a linzer cookie but minus the faff of tiny cut-outs in every top layer, and with exactly enough jam to keep the fairly short biscuit from being too dry and bland. They're adorably festive, a cinch to assemble and since each finished one is actually made from two biscuits, they're also heartier than a normal biscuit- so perfect for bringing to your next booze-soaked holiday fête.

one year ago: Crazy Crust apple pie
two years ago: Pumpkin Gingerbread cupcakes

The recipe:

Walnut Ribbon Sticks

the directions:

Preheat oven to 225C/450F and grease a cookie sheet.
Roll crust into approximate thickness of pie dough (about ¼ inch).
Spread half of dough with jam and sprinkle with walnuts.
Fold crust over filling and roll lightly again- the layers of dough should adhere to each other thanks to the jam, but you don't want the walnuts to break through the dough.
Using a very sharp knife and wiping it clean between cuts, slice into 1/4” wide strips.
Coil the strips like ribbon candy by folding them back and forth on themselves (as seen above), wind into spirals or twist into long ribbons (if you twist into ribbons, make sure you twist them quite tight or they'll unravel in the oven).
Bake 7-9 minutes until light golden brown.
Allow to cool completely on a cooling rack before handling.

the ingredients:

1 recipe double-crust pie crust or 1 package puff pastry (use your favourite recipe- I used Julia Child's pie crust recipe)
¼ c raspberry jam
½ c walnuts, finely chopped (you'll want them finer than shown here so they stay in the dough better)

the recipe:

Dusen Stars

the directions:

Preheat oven to 175C/350F.
Cream butter until light and fluffy.
Gradually add sugar, beating well until incorporated.
Add flour, vanilla and almonds, continuing to beat well.
Chill at least two hours or overnight.
Roll ¼-inch thick on a floured work surface.
Cut with 2-inch cookie cutter (ideally a star, as the name suggests, but as long as you're doing two of each shape you make, they could be whatever shape you want).
Place on cookie sheet 1-inch apart and bake for 10 minutes or until edges are just beginning to turn golden.
Allow to cool slightly, but while still just warm, slather the bottom of one cookie with jam and adhere the bottom of another cookie to it.
Once all cookies are finished, sprinkle with powdered sugar to complete the festive look.

the ingredients:

1 c butter
½ c sugar
2 c flour, sifted
½ tsp vanilla
4 oz ground almonds
Approximately 1 cup Raspberry, currant, or apricot jam
Powdered sugar for dusting